

What Are Filters?
Google Analytics filters are a way for you to interact with data before it finally is added for processing. Filters are mostly used to remove data (such as analytics spam or internal IP addresses), but they can also be used to modify or include data (such as adding domain names to all URLs).
Step 1 – Open Filters In Admin
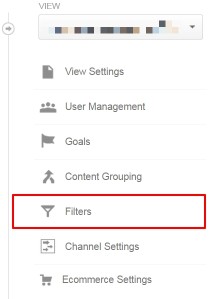
From the Google Analytics admin, select the view that you wish to filter and select “Filters” underneath it.
Step 2 – Add A New Filter
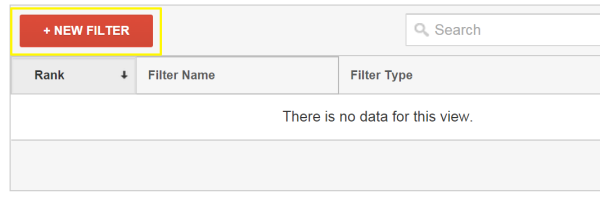
Click the red “+ New Filter” button at the top of the filter information box.
Step 3 – Select New Filter
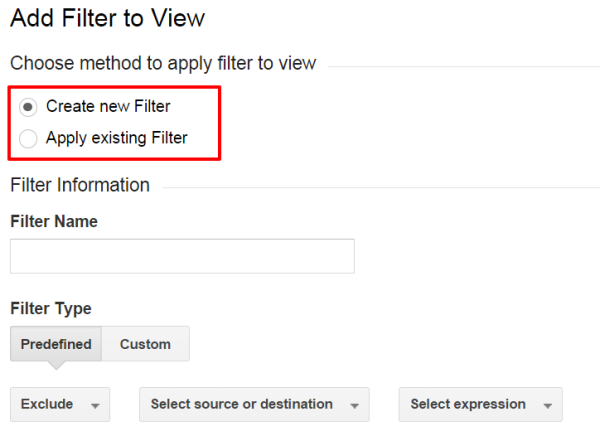
From here, you’ll select if you want to apply an existing filter from your property, or create a new filter. We want to create a new filter here.
Step 4 – Name Your Filter

You’ll want to give your filter a descriptive name.
Step 5 – Select Filter Type
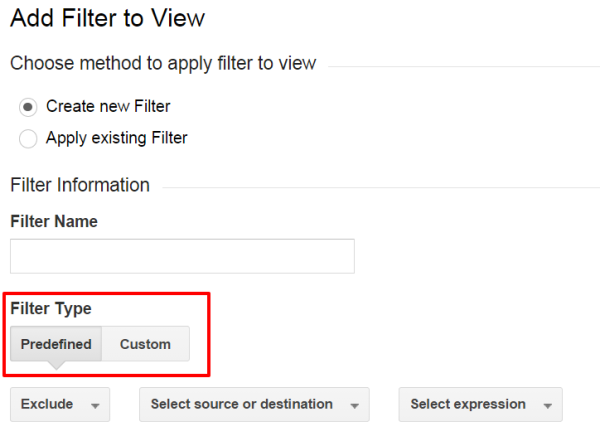
Here you select the filter type – predefined or custom. Predefined is an easy way to remove your IP address, traffic from a domain, and other common tasks. Custom is for more advanced things such as domain name additions and analytics spam removal.
Step 6 – Add Filter Information
From here, you’ll want to know what you are filtering and add the needed information. Here are some common filters:
- Block Internal Traffic From A Static IP Address – Predefined
- Block Analytics Spam – Custom
Leave a Reply